

Getting Started
Install and deploy Propeller, the open-source WebAssembly orchestrator. Step-by-step setup for Go, Rust, Docker, and Wasmtime — from clone to first Wasm workload deployment.
This guide walks you through installing Propeller and running your first WASM workload in under 15 minutes.
Prerequisites
| Tool | Version | Purpose |
|---|---|---|
| Go | 1.27.0 | Building Propeller binaries |
| Rust | 1.97.1 | Building the proplet runtime |
| Docker | 29.6.2 | Running base services (Atom, FluxMQ) |
| Make | 4.4.1 | Build automation |
| Mosquitto Tools | 2.1.2 | MQTT CLI utilities |
These are only needed if you plan to build WASM modules locally:
Note:
rustupwill install the Rust toolchain andcargo. You will also use it to add WebAssembly targets.
Download Pre-built Binaries
You can download pre-built binaries from the GitHub Releases page.
Docker Images
Propeller also provides pre-built Docker images via GitHub Container Registry:
| Service | Image |
|---|---|
| Manager | ghcr.io/absmach/propeller/manager:latest |
| CLI | ghcr.io/absmach/propeller/cli:latest |
| Proxy | ghcr.io/absmach/propeller/proxy:latest |
| Proplet | ghcr.io/absmach/propeller/proplet:latest |
| Proplet (WASI-NN) | ghcr.io/absmach/propeller/proplet:wasi-nn |
To pull the latest images:
docker pull ghcr.io/absmach/propeller/manager:latest
docker pull ghcr.io/absmach/propeller/cli:latest
docker pull ghcr.io/absmach/propeller/proxy:latest
docker pull ghcr.io/absmach/propeller/proplet:latest
For WASI-NN (OpenVINO) support:
docker pull ghcr.io/absmach/propeller/proplet:wasi-nnNote: The WASI-NN image is only available for
linux/amd64architecture due to OpenVINO limitations.
Multi-Architecture Support
Docker images are built for multiple architectures:
| Architecture | manager | cli | proxy | proplet | proplet-wasi-nn |
|---|---|---|---|---|---|
| amd64 | ✓ | ✓ | ✓ | ✓ | ✓ |
| arm64 | ✓ | ✓ | ✓ | ✓ | ✗ |
| riscv64 | ✓ | ✓ | ✓ | ✗ | ✗ |
Build from Source
Step 1: Clone and Build
git clone https://github.com/absmach/propeller.git
cd propeller
make all -j $(nproc)
make install
What the build process does
During the build, you will see output similar to:
CGO_ENABLED=1 GOOS=linux GOARCH=amd64 go build -ldflags "-s -w -X 'github.com/absmach/propeller.BuildTime=2026-07-31T09:46:15Z' -X 'github.com/absmach/propeller.Version=v0.5.0' -X 'github.com/absmach/propeller.Commit=f429cade612048d02e2bd845968d1dabf2af3fea'" -o build/manager cmd/manager/main.go
CGO_ENABLED=0 GOOS=linux GOARCH=amd64 go build -ldflags "-s -w -X 'github.com/absmach/propeller.BuildTime=2026-07-31T09:46:15Z' -X 'github.com/absmach/propeller.Version=v0.5.0' -X 'github.com/absmach/propeller.Commit=f429cade612048d02e2bd845968d1dabf2af3fea'" -o build/cli cmd/cli/main.go
CGO_ENABLED=0 GOOS=linux GOARCH=amd64 go build -ldflags "-s -w -X 'github.com/absmach/propeller.BuildTime=2026-07-31T09:46:15Z' -X 'github.com/absmach/propeller.Version=v0.5.0' -X 'github.com/absmach/propeller.Commit=f429cade612048d02e2bd845968d1dabf2af3fea'" -o build/proxy cmd/proxy/main.go
cd proplet && cargo build --release && cp target/release/proplet ../build
GOOS=js GOARCH=wasm tinygo build -buildmode=c-shared -o build/addition.wasm -target wasi examples/addition/addition.go
GOOS=js GOARCH=wasm tinygo build -buildmode=c-shared -o build/compute.wasm -target wasi examples/compute/compute.go
GOOS=js GOARCH=wasm tinygo build -buildmode=c-shared -o build/hello-world.wasm -target wasi examples/hello-world/hello-world.go
mkdir -p build
mkdir -p build
cd examples/greet-component && cargo build --target wasm32-wasip2 --release
cd examples/http-client && cargo build --release
mkdir -p build
cd examples/http-client-raw-wit && cargo build --release
mkdir -p build
mkdir -p build
mkdir -p build
mkdir -p build
cd examples/http-greet-component && cargo build --target wasm32-wasip2 --release
cd examples/http-server && cargo build --release
cd examples/filesystem && cargo build --release
cd examples/hal-test && cargo build --target wasm32-wasip2 --release
mkdir -p build
cd examples/attestation-test && cargo build --target wasm32-wasip2 --release
mkdir -p build
cd examples/hal-runner && cargo build --release
    Finished `release` profile [optimized] target(s) in 0.91s
cp examples/filesystem/target/wasm32-wasip2/release/filesystem.wasm build/filesystem.wasm
    Finished `release` profile [optimized] target(s) in 1.04s
    Finished `release` profile [optimized] target(s) in 1.05s
    Finished `release` profile [optimized] target(s) in 1.04s
cp examples/greet-component/target/wasm32-wasip2/release/greet_component.wasm build/greet-component.wasm
cp examples/attestation-test/target/wasm32-wasip2/release/attestation_test.wasm build/attestation-test.wasm
cp examples/hal-test/target/wasm32-wasip2/release/hal_test.wasm build/hal-test.wasm
    Finished `release` profile [optimized] target(s) in 1.19s
cp examples/http-greet-component/target/wasm32-wasip2/release/http_greet_component.wasm build/http-greet-component.wasm
    Finished `release` profile [optimized] target(s) in 1.97s
cp examples/http-server/target/wasm32-wasip2/release/http_server.wasm build/http-server.wasm
    Finished `release` profile [optimized] target(s) in 2.04s
    Finished `release` profile [optimized] target(s) in 2.07s
cp examples/http-client/target/wasm32-wasip2/release/http-client.wasm build/http-client.wasm
cp examples/http-client-raw-wit/target/wasm32-wasip2/release/http-client-raw-wit.wasm build/http-client-raw-wit.wasm
    Finished `release` profile [optimized] target(s) in 2.17s
cp examples/hal-runner/target/release/hal-runner build/hal-runner
   Compiling kbs_protocol v0.1.0 (https://github.com/rodneyosodo/guest-components?branch=enable-wasm-workloads#0e819e7f)
   Compiling attestation-agent v0.1.0 (https://github.com/rodneyosodo/guest-components?branch=enable-wasm-workloads#0e819e7f)
   Compiling proplet v0.5.0 (/home/rodneyosodo/code/absmach/propeller/proplet)
    Finished `release` profile [optimized] target(s) in 1m 01s
This means:
- All Go binaries were built and placed into
build/ - All example WASM modules were built using TinyGo into
build/
make install copies the compiled binaries into your $GOBIN directory so you can run them directly from your terminal.
If make install fails
You likely don't have your Go binary path ($GOBIN) configured. Set it up like this:
export GOBIN=$HOME/go/bin
export PATH=$PATH:$GOBIN
make install
See the Developer Guide for other common build problems.
Step 2: Start Base Services
Atom and FluxMQ provide identity, authorization, and messaging for Propeller. From the root of the propeller repo:
cd propeller
make start-base
This runs:
docker compose -f docker/compose.yaml --env-file docker/.env up -dThe output will look something like:
docker compose -f docker/compose.yaml --env-file docker/.env up -d
[+] up 10/10
 ✔ Network propeller-base-net                          Created                       0.2s
 ✔ Volume propeller-base_propeller-atom-db-volume      Created                       0.1s
 ✔ Volume propeller-base_propeller-fluxmq-node1-volume Created                       0.0s
 ✔ Container propeller-atom-db                         Healthy                      19.5s
 ✔ Container propeller-jaeger                          Started                       4.1s
 ✔ Container propeller-atom                            Started                      17.9s
 ✔ Container propeller-fluxmq-auth                     Started                      18.6s
 ✔ Container propeller-atom-ui                         Started                      18.7s
 ✔ Container propeller-fluxmq-node1                    Started                      19.4s
 ✔ Container propeller-nginx                           Started                      21.6s
Only base services (Atom, FluxMQ, Nginx, and their dependencies) start at this point. Wait ~30–60 seconds for internal services to stabilise before proceeding. Verify with:
docker ps | grep propellerLogs from docker logs propeller-atom look like this once Atom is ready:
2026-07-31T10:03:36.677291Z INFO atom: atom listening on 0.0.0.0:8080Step 3: Provision Propeller
Now we create everything Propeller needs inside Atom and generate the config file:
propeller-cli provisionThis command will:
- Log you into Atom (you must have an Atom user already created; if not, create one via Atom's API or signup flow)
- Create a tenant (or find an existing one with the same name)
- Create a manager entity (kind: service, profile: Service Account) with an API key
- Create proplet entities with API keys
- Create a proxy entity with an API key
- Create a channel (resource) for MQTT communication
- Connect all entities to the channel via permission blocks and direct policies (publish & subscribe)
- Write all IDs and keys into a
config.tomlfile in the current directory
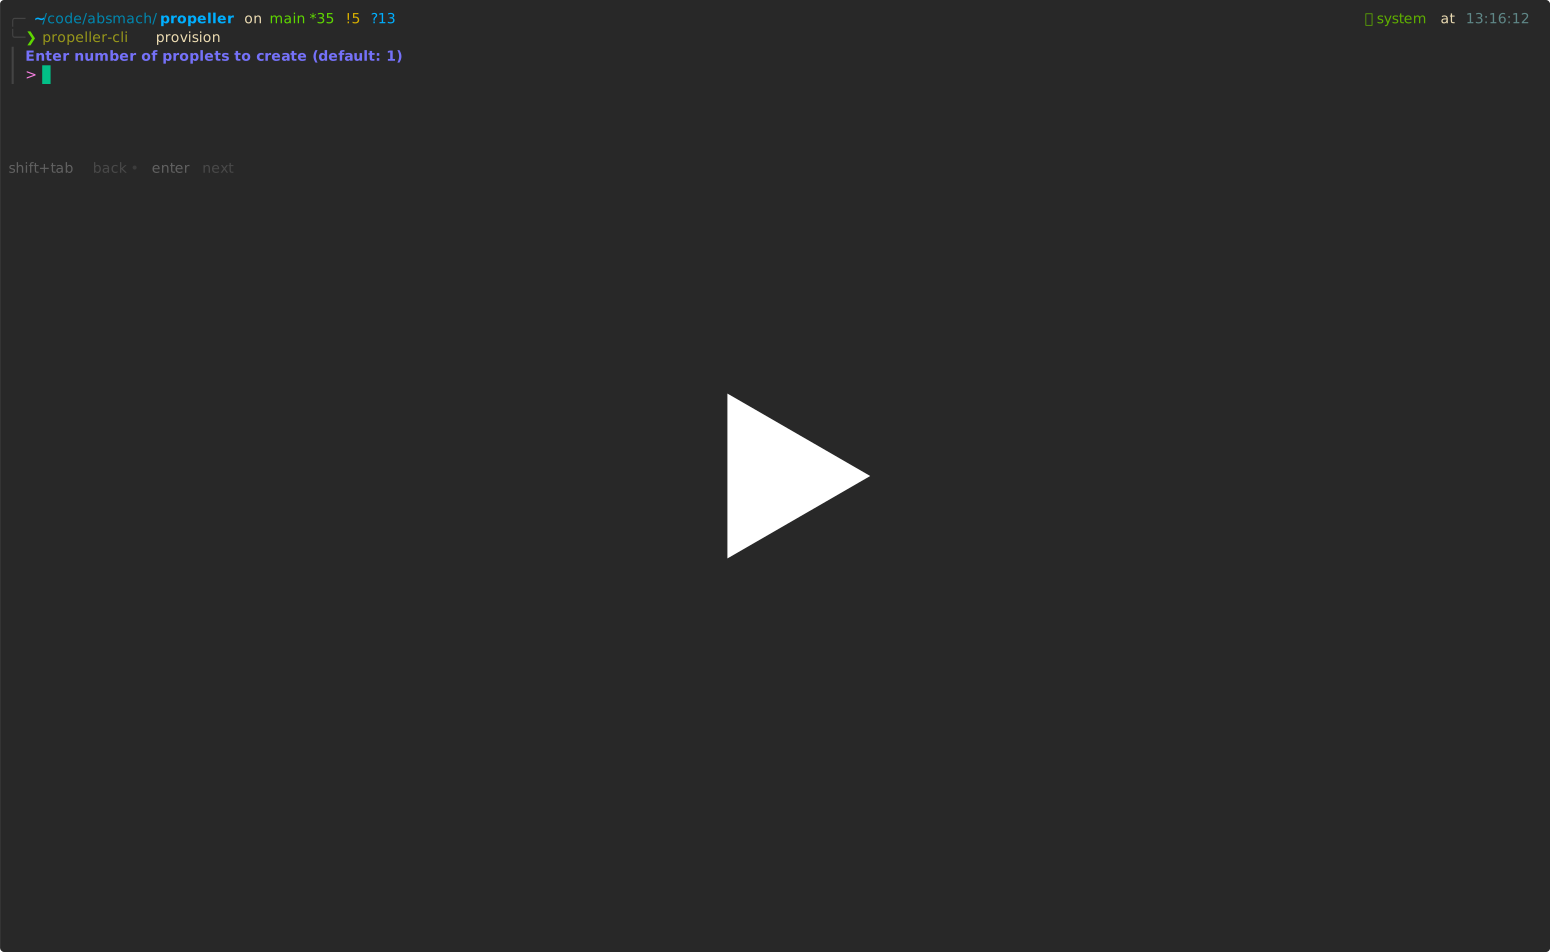
The process will look something like this:
On success:
Successfully created config.toml fileYour config.toml will look like:
# Propeller Configuration
# Each identity is an Atom entity of kind "service", profile "Service Account".

[manager]
tenant_id = "e9118da7-0c13-4393-b8b5-e248e0ca6b52"
entity_id = "8d47509d-4a75-4cda-a057-7e85513790b2"
api_key = "atom_b8a290d505b94918a0d730bf1a82bde6_2edd8cb8487e9cbf3c0ead2654a2d9df6937bcf7cfe2b6392485a36c83e1e098"
channel_id = "425d19f8-71fc-4591-adb5-f89089655d7e"

[proplet]
tenant_id = "e9118da7-0c13-4393-b8b5-e248e0ca6b52"
entity_id = "b47417f3-f69e-4407-ad55-d5592e93906c"
api_key = "atom_0cb37e68133e4d85a8fb55dc29cf2000_4db4b0f3738e7a9908a4e12cd4f90997046c6f5c2eb93df1d86bf408f7196030"
channel_id = "425d19f8-71fc-4591-adb5-f89089655d7e"

[proxy]
tenant_id = "e9118da7-0c13-4393-b8b5-e248e0ca6b52"
entity_id = "1197c9ee-e257-4f2d-96a7-3a99fb7faca1"
api_key = "atom_e773235094364aca90c2ca138684f3dc_337c74a172df1579488a1148c74d5815a6863e3e33159c09c1f7bb7f9e8e4a56"
channel_id = "425d19f8-71fc-4591-adb5-f89089655d7e"
Step 4: Configure and Start Propeller
Copy the configuration to the Docker directory (the Propeller compose file mounts config.toml from there):
cp config.toml docker/config.tomlThe volume mounts for config.toml are already configured in docker/compose.propeller.yaml. Copy the config and start Propeller:
make start-propellerThis runs:
docker compose -f docker/compose.propeller.yaml --env-file docker/.env up -dThe three Propeller containers start, read config.toml from their mount paths, and connect to Atom and FluxMQ over the shared propeller-base-net network.
Step 5: Verify Deployment
Check each service is running:
# Manager logs
docker logs propeller-manager | tail -5
Expected:
{"time":"2026-07-31T10:36:22.215275551Z","level":"INFO","msg":"MQTT connection established"}
{"time":"2026-07-31T10:36:22.244721274Z","level":"WARN","msg":"MANAGER_COORDINATOR_URL not configured - FL features will not be available"}
{"time":"2026-07-31T10:36:22.428315303Z","level":"INFO","msg":"Subscribe to MQTT topic completed successfully","duration":"183.383289ms"}
{"time":"2026-07-31T10:36:22.428427657Z","level":"INFO","msg":"Recover interrupted tasks completed successfully","duration":"17.263µs"}
{"time":"2026-07-31T10:36:22.428646062Z","level":"INFO","msg":"cron scheduler started","check_interval":60000000000}
{"time":"2026-07-31T10:36:22.428710044Z","level":"INFO","msg":"manager service HTTP server listening at manager:7070"}
{"time":"2026-07-31T10:36:22.797370311Z","level":"INFO","msg":"successfully created proplet"}# Proplet logs
docker logs propeller-proplet | tail -5Expected:
{"timestamp":"2026-07-31T10:36:22.126178Z","level":"INFO","fields":{"message":"Starting Proplet (Rust) - Client ID: 7fe414f2-ec79-4ae9-9f8f-32213f473024"}}
{"timestamp":"2026-07-31T10:36:22.126312Z","level":"INFO","fields":{"message":"MQTT client created (TLS: false)"}}
{"timestamp":"2026-07-31T10:36:22.126492Z","level":"INFO","fields":{"message":"Starting MQTT event loop"}}
{"timestamp":"2026-07-31T10:36:22.126681Z","level":"INFO","fields":{"message":"Using external Wasm runtime: wasmtime"}}
{"timestamp":"2026-07-31T10:36:22.128103Z","level":"INFO","fields":{"message":"Telemetry server listening on 0.0.0.0:9092"}}
{"timestamp":"2026-07-31T10:36:22.153216Z","level":"INFO","fields":{"message":"Starting PropletService"}}
{"timestamp":"2026-07-31T10:36:22.162750Z","level":"INFO","fields":{"message":"Published discovery message"}}
{"timestamp":"2026-07-31T10:36:22.162769Z","level":"INFO","fields":{"message":"Subscribed to topic: m/c676fdcf-4682-4c06-ad85-968c4f3b7642/c/26453a49-20e8-4d67-ad20-7de663bda008/control/manager/start"}}
{"timestamp":"2026-07-31T10:36:22.162773Z","level":"INFO","fields":{"message":"Subscribed to topic: m/c676fdcf-4682-4c06-ad85-968c4f3b7642/c/26453a49-20e8-4d67-ad20-7de663bda008/control/manager/stop"}}
{"timestamp":"2026-07-31T10:36:22.162776Z","level":"INFO","fields":{"message":"Subscribed to topic: m/c676fdcf-4682-4c06-ad85-968c4f3b7642/c/26453a49-20e8-4d67-ad20-7de663bda008/registry/server"}}
{"timestamp":"2026-07-31T10:36:22.172227Z","level":"INFO","fields":{"message":"MQTT session not present, triggering re-subscription"}}
{"timestamp":"2026-07-31T10:36:22.172408Z","level":"INFO","fields":{"message":"Reconnection detected, re-subscribing to topics"}}
{"timestamp":"2026-07-31T10:36:22.172443Z","level":"INFO","fields":{"message":"Subscribed to topic: m/c676fdcf-4682-4c06-ad85-968c4f3b7642/c/26453a49-20e8-4d67-ad20-7de663bda008/control/manager/start"}}
{"timestamp":"2026-07-31T10:36:22.172451Z","level":"INFO","fields":{"message":"Subscribed to topic: m/c676fdcf-4682-4c06-ad85-968c4f3b7642/c/26453a49-20e8-4d67-ad20-7de663bda008/control/manager/stop"}}
{"timestamp":"2026-07-31T10:36:22.172458Z","level":"INFO","fields":{"message":"Subscribed to topic: m/c676fdcf-4682-4c06-ad85-968c4f3b7642/c/26453a49-20e8-4d67-ad20-7de663bda008/registry/server"}}
{"timestamp":"2026-07-31T10:36:22.172463Z","level":"INFO","fields":{"message":"Successfully re-subscribed to topics after reconnection"}}# Proxy logs
docker logs propeller-proxy | tail -3Expected:
{"time":"2026-07-31T10:36:22.212398462Z","level":"INFO","msg":"successfully initialized MQTT and HTTP config"}
{"time":"2026-07-31T10:36:22.212757294Z","level":"INFO","msg":"starting proxy service"}
{"time":"2026-07-31T10:36:22.212421145Z","level":"INFO","msg":"MQTT connection established"}
{"time":"2026-07-31T10:36:22.315113891Z","level":"INFO","msg":"successfully subscribed to topic"}
{"time":"2026-07-31T10:36:22.315195907Z","level":"INFO","msg":"health server listening","addr":":9191"}
Health check
Verify the manager API is up:
curl http://localhost:7070/healthVerify the proplet has registered:
curl http://localhost:7070/propletsDeploy Your First Workload
List Available Proplets
curl http://localhost:7070/proplets | jq{
"offset": 0,
"limit": 100,
"total": 1,
"proplets": [
{
"id": "7fe414f2-ec79-4ae9-9f8f-32213f473024",
"name": "Millikan-Keep",
"task_count": 0,
"alive": true,
"last_alive_at": "2026-07-31T10:37:32.267535964Z",
"metadata": {
"ip": "172.30.0.8",
"environment": "docker",
"os": "linux",
"hostname": "da96186e4b1d",
"cpu_arch": "x86_64",
"proplet_version": "0.5.0",
"wasm_runtime": "wasmtime"
}
}
]
}Create a Task
curl -X POST "http://localhost:7070/tasks" \
  -H "Content-Type: application/json" \
-d '{"name": "add", "inputs": [10, 20]}'{
"id": "6802cad2-a370-43f8-9b38-449e6db41724",
"name": "add",
"kind": "standard",
"state": 0,
"cli_args": null,
"inputs": ["10", "20"],
"daemon": false,
"encrypted": false,
"start_time": "0001-01-01T00:00:00Z",
"finish_time": "0001-01-01T00:00:00Z",
"created_at": "2026-07-31T10:38:16.298892913Z",
"updated_at": "0001-01-01T00:00:00Z",
"next_run": "0001-01-01T00:00:00Z",
"priority": 50
}You can also use the CLI:
# propeller-cli tasks create <name>
propeller-cli tasks create demo
Get a Task
curl -X GET "http://localhost:7070/tasks/6802cad2-a370-43f8-9b38-449e6db41724"CLI equivalent:
# propeller-cli tasks view <id>
propeller-cli tasks view 6802cad2-a370-43f8-9b38-449e6db41724
Upload a WASM Module
There are two ways to upload a WASM file:
Option A — Upload via file:
curl -X PUT "http://localhost:7070/tasks/6802cad2-a370-43f8-9b38-449e6db41724/upload" \
  -F 'file=@build/addition.wasm'
Option B — Upload via base64-encoded WASM in the task body:
curl --location --request PUT 'http://localhost:7070/tasks/2226e867-1f9f-4ff2-b8e7-f0ea46830664' \
  --header 'Content-Type: application/json' \
  --data '{
    "file": "AGFzbQEAAAABBwFgAn9/AX8DAgEABwgBBG1haW4AAAoJAQcAIAAgAWoL"
}'
CLI equivalent:
propeller-cli tasks update 2226e867-1f9f-4ff2-b8e7-f0ea46830664 '{"file": "AGFzbQEAAAABBwFgAn9/AX8DAgEABwgBBG1haW4AAAoJAQcAIAAgAWoL"}'Start the Task
curl -X POST "http://localhost:7070/tasks/6802cad2-a370-43f8-9b38-449e6db41724/start"{ "started": true }CLI equivalent:
# propeller-cli tasks start <id>
propeller-cli tasks start 6802cad2-a370-43f8-9b38-449e6db41724
Check Results
curl "http://localhost:7070/tasks/<task_id>" | jqThe task state will change from 0 (pending) to 3 (completed) with the result in the results field.
Stop a Task
curl -X POST "http://localhost:7070/tasks/<task_id>/stop"Creating Tasks from OCI Registry Images
For WASM modules stored in an OCI registry, specify the image URL during task creation. The proxy automatically retrieves the WASM file from the registry when the task starts, eliminating manual uploads:
curl -X POST "http://localhost:7070/tasks" \
  -H "Content-Type: application/json" \
  -d '{"name": "add", "inputs": [10, 20], "image_url": "docker.io/mrstevenyaga/add.wasm"}'
Alternative: Run Without Docker
You can run Propeller binaries directly on your host (useful for development or debugging). Atom and FluxMQ still run in Docker via make start-base, but the Propeller processes run locally.
The provisioning step is the same: run propeller-cli provision to generate config.toml, then ensure it is in the directory where you start the binaries.
Stop the Docker-based Propeller services first if they are running:
docker stop propeller-manager propeller-proxy propeller-propletThen start each service in a separate terminal:
# Terminal 1
propeller-manager

# Terminal 2
propeller-proplet

# Terminal 3 — set registry env vars before starting proxy
export PROXY_REGISTRY_URL="docker.io"
export PROXY_AUTHENTICATE="TRUE"
export PROXY_REGISTRY_USERNAME=""   # set if your registry requires auth
export PROXY_REGISTRY_PASSWORD=""   # set if your registry requires auth
propeller-proxy
Docker is recommended for production; local binaries are easier for debugging.
Adding More Proplets to an Existing Deployment
Once your initial deployment is running, you can add more proplets without re-provisioning from scratch. The add-proplets subcommand reads your existing config.toml, creates new Atom service entities with API keys, connects them (via permission blocks and direct policies) to the same channel, and appends their credentials to the file.
propeller-cli provision add-propletsThe command asks for your Atom username and password, then for the number of new proplets to create. For example, if you already have one proplet ([proplet]) and add two more, the file becomes:
# Propeller Configuration
# Each identity is an Atom entity of kind "service", profile "Service Account".

[manager]
tenant_id = "c676fdcf-4682-4c06-ad85-968c4f3b7642"
entity_id = "ed5b4f74-5c61-460e-bd5c-46aeeacfbf0a"
api_key = "atom_3a1f14fb5cc04d40ad67233141d9313c_644d1fa89750bf212b9cbac764e488fc7955cb2bc9105a1e7352241412773ed3"
channel_id = "26453a49-20e8-4d67-ad20-7de663bda008"

[proplet]
tenant_id = "c676fdcf-4682-4c06-ad85-968c4f3b7642"
entity_id = "7fe414f2-ec79-4ae9-9f8f-32213f473024"
api_key = "atom_f4f70b7696f34301ac716228236d36e6_60ae665f396e3864dfe240629c1d43e1e6851f0f69c01335e0728e67374aea40"
channel_id = "26453a49-20e8-4d67-ad20-7de663bda008"

[proplet2]
tenant_id = "c676fdcf-4682-4c06-ad85-968c4f3b7642"
entity_id = "9dfddfe4-34ff-4a82-aa45-3152560a8648"
api_key = "atom_9a4377a4a2234e08965b72a7c43a2eeb_1024c30c82da8f80f9593d63d856c42f8fa81f54bb165f456e860dd70c003bed"
channel_id = "26453a49-20e8-4d67-ad20-7de663bda008"

[proxy]
tenant_id = "c676fdcf-4682-4c06-ad85-968c4f3b7642"
entity_id = "7f3e0f9c-7430-486b-a794-a52bf9f3bd1a"
api_key = "atom_3f6ef9e8eabf4d4b981bdbe31abee55a_35790a8d1de46e1f60978c1989195de8b78f456d524b8c184307af86e73b4b54"
channel_id = "26453a49-20e8-4d67-ad20-7de663bda008"
Note: New sections are always numbered from where the existing count left off.
Each new proplet process needs to know which section of config.toml to read. Set the PROPLET_CONFIG_SECTION environment variable before starting it:
PROPLET_CONFIG_SECTION=proplet2 propeller-proplet
PROPLET_CONFIG_SECTION=proplet3 propeller-proplet
Or in docker/compose.propeller.yaml, add an environment entry per proplet service:
environment:
  PROPLET_CONFIG_SECTION: proplet2
After copying the updated config.toml into docker/, restart only the Propeller services:
make stop-propeller
make start-propeller
Adding or Replacing a Proxy Entity
If your config.toml was created before the proxy was part of Propeller, or you need to regenerate the proxy credentials, use the add-proxy subcommand:
propeller-cli provision add-proxyThis command:
- Reads your existing
config.tomlto extracttenant_idandchannel_id - Creates a new Atom service entity with an API key for the proxy
- Connects the entity to the existing channel
- Updates the
[proxy]section in yourconfig.toml
Postman Collection
A Postman collection of all API calls is available for interacting with the Propeller system.
What's Next?
| Goal | Documentation |
|---|---|
| Build from source | Developer Guide |
| Understand the architecture | Architecture |
| See working examples | Examples |
| Run on embedded devices | Embedded Proplet |
| Use the REST API | API Reference |
| Monitor deployments | Monitoring |
| Enable secure enclaves | TEE |